Thursday, March 28, 2013

Brew Day - Dunkelrot Kristallreisen

Going along with my Berry Beer I thought something like a Hefeweizen would be a nice spring/summer evening sipper.  In my scouring of the Home Brew Talk Gluten Free forums I stumbled over Igliashon’s Purple Hefereisen.  The uniqueness of the Purple rice is what really intrigued me, so I thought I would adapt it to my ingredients and give it a whirl, and a whirl of a day it was.  The brew day went well for the most part right up until I got distracted while making my dinner and grabbed the handle of a pan that had just came out of a 200°C (400°F) oven.   After that Mrs. Thirsty reminded me again why I love her and not only finished making dinner and played nurse to yours truly but she also finished up the brew day.  What a wonderful woman I tell you.  Well, on with the show.
Dunkelrot Kristallreisen
Batch Size: 10.25L         Type: Extract / Partial Boil         Boil Size: 7.2L           Boil Time: 60min

Calculated OG: 1.048      Measured OG: 1.063      Calculated FG: 1.008       Bitterness: 19.1IBUs

Grain Bill
2.00kg Purple Rice (aka Forbidden Rice) – Steeped for an hour

0.25kg Rice Syrup – Boil for 60min
1.00kg Rice Syrup – Boil for 40min
0.35kg Amber Belgian Candy Sugar – Boil for 5min
 
The Ingredients

Hop Schedule
5.00g Tettnang [5.50 %] – First Wort Hop 15min
5.00g Cascade [7.30 %] – Boil 40,0min
5.00g Tettnang [5.50 %] – Boil 20,0min
5.00g Cascade [7.30 %] – Boil 5,0min
5.00g Tettnang [5.50 %] – at Flameout

Miscellaneous
10.00ml Brewferm Beerzym MULTI – Added to steeping water
5.00 g Irish Moss – Boil 10min
50.00 g Malto-Dextrin – Boil 5min
15.00 g Blood Orange Peel – Boil 5min
6.00 g Cracked Coriander – Boil 5min
8.00 g Yeast Nutrient – Added to yeast while rehydrating

1 pkg SafBrew Specialty Ale (DCL/Fermentis #T-58)

  
The steeping setup, a quick rig

So the purpose here, after making a quaffable brew of course, is to make an attempt at playing with the enzyme that I bought a couple months back when I first started this whole brewing hobby.  To this end I decided to steep the rice hot water (154-165°F) for about an hour with some of the enzyme and see what happens.  In this case, the water turned a beautiful dark purple that is almost black but when I tested a sample with the hydrometer, there was absolutely no sugar converted.

  
Beautiful dark purple


When I go back now and think about this, it’s obvious that there shouldn’t be, because the rice was never brought to a temperature where is would release starch into the water, so the enzyme never had anything to work with.  Not a huge problem but a bit of a disappointment that I missed something so fundamental to brewing.  I’m going to have to take a look at my plans for future brews and make sure I don’t make the same mistake.

Another rigged setup to let the water drip from the rice
So once the rice was steeped I pulled it out and set it on a grate over the kettle so any water might drip in.  During this time I threw in 5g of the Tettnang hops to sit for 15 minutes in the hot water before beginning the boil.  The idea behind First Wort Hopping is to take some of the aroma hops that are generally added late in the boil and add them to the 50-70°C wort that is drained from the bag in this case.  This action will add bitterness to the brew that is more uniform and a hop aroma that is more balanced and complex.  

The target of this beer when I was building it in Beersmith I decided would be a Dunkelweizen.  This is a fruity and spicy wheat beer which dark with a malty richness.  Going with the dark purple rice and the Rice Syrup base I thought this was appropriate.   The caramelized honey should add a bit of a malty backbone and the IBUs as calculated are a little higher than is acceptable for a Dunkelweizen, but it should be tasty.
So the boil went well, and I put the pot outside to cool.  While the wort was cooling, I started prepping dinner.  I put a frying pan in the oven at 200°C (400°F) for a steak and then decided to throw some of the rice into a pan.  The rice was not quite cooked so I cooked a little bacon up, added some red pepper and the rice and a little water to steam it all together.  In the mean time I pulled the pan out of the oven and put in on the stove top.  I put a little salt and pepper on the steak and went to grab the frying pan, to move the handle to the side.  The searing pain reminded me that the frying pan was just in the oven.  I cried out and immediately put my hand under some cold water while Mrs. Thirsty came in to find out the problem.


Sitting in the carboy, working away.


From here on out Mrs. Thirsty finished up my dinner for me, searing the steak on each side for 30 seconds then putting the whole pan back in the oven for 5 minutes.  After dinner, when the wort cooled, Mrs. Thirsty poured it into the carboy and added bottled water to 10L and then she rehydrated the yeast with 250ml of bottled water and 8g of yeast nutrient and added all of it to the carboy.

Release the Krausen!!
  
The next morning when I looked in on the beer, I could tell the yeast was excited.  A thick, purple krausen, had pushed up through the airlock, causing the little red cap to pop off and a little spray of purple to spread around the carboy.  I’m thinking next time I need a blow off tube because this happened 4 more times over the next two days.  Each time I cleaned the airlock out and refilled it, proving I am just a little insane by repeating the same actions hoping for different results.  After a couple days it did slow down and the airlock has stayed clear.  I’m going to plan on carbonating this on the low end of the style range and I’m really looking forward to the first taste.
Enjoy!
Photos courtesy of Mrs. Thirsty


Friday, March 15, 2013

Brew Day - Ginger Beer

Another spring beer that I’ve been thinking about for a while is a Ginger Beer.  I’ve had a few ginger beers over the years, both alcoholic and non-alcoholic.  They tend to be fairly one note with a sharp ginger bite and leaving your lips tingling for hours from drinking a pint.  Proper ginger beer is brewed using a ginger beer plant.  This is an organism that is a composite of yeast and bacteria.  In this case I’m more brewing a beer with prominent ginger flavour.
Ginger Beer
Batch Size: 10.25L           Type: Extract                    Boil Size: 7L                       Boil Time: 45min

Calculated OG: 1.046      Measured OG: 1.052       Calculated FG: 1.004         Bitterness : 17.3IBUs

Grain Bill
1.00 kg Amber Agave Syrup – Boil 45min
0.46 kg Ripe Bananas – Boil for 45min
0.25 kg Amber Belgian Candy Sugar – Boil for 45min

Getting prepped
 0.25 kg Milk Sugar – Boil for 30min

Hop Schedule
15.00 g Tradition [6.70 %] – Boil for 45min

Miscellaneous
200.0 g Ginger Root, chopped skin on – Boil for 45min
100.0 g Ginger Root, chopped skin on – Boil for 30min
100.0 g Ginger Root, chopped skin on – Boil for 15min
5.00 g Irish Moss – Boil 15min
10.00 g Lemon Grass, chopped – Boil 5min
10.00 g Lemon Zest, chopped – Boil 5min
5 whole Cloves – Boil 5min
5.00 g Nutmeg, fine grated – Boil 5min
2 whole Cinnamon Sticks, broken – Boil 5min

½ pkg SafBrew Ale (DCL/Fermentis #S-33)
30 g Light Brown Sugar

100.0 g Ginger Root, chopped skin on, soaked in vodka 2 weeks – In secondary for 7 days


Everything boiling away, it looks like a lovely ginger soup ;)
 My plan here is to layer flavours, one over the other, like a well made meal.  Starting with the hops to provide a base canvas of bitterness, I then plan on three different additions of ginger.  By cooking the ginger for three different lengths of time, it will change the flavour that each provides.  The longer it cooks, the mellower the flavour will be, so in this case I will be adding a bit of sharpness a with each addition.  The final racking over the raw ginger soaked in vodka will provide that final layer of sharp aroma and taste.  The lemon grass, zest, cloves, nutmeg and cinnamon should add mild flavours and significant aromatics to the beer.  The milk sugar should only be about 75% fermentable, leaving a little bit of sweetness and body in the beer.  I’ll taste at the first racking and then again at the bottling and if the body is thin I may add a little bit of Malto-Dextrin to improve the mouth feel.  This beer may come out a bit hot, meaning the alcohol taste may wind up being very prominent but as I understand aging will mellow this heat.  At this point I will plan on aging as is, though if this beer comes out well, I may try aging it over lightly toasted oak chips next time, to add a bit of vanilla to the flavour profile.  The banana here is really not adding much flavour, but is more there for the protein and texture it provides to mouth feel and head retention.

The brewing went really well for this beer, making the whole apartment smell wonderful.  Even the garbage pail smells great because of the left over ginger and banana.  When the cooled wort was transferred to the carboy, it was a medium dark brown, a little darker than Vernors.  After some of the sediment drops out it should be a nice, clear golden colour like Canada Dry.  The yeast I’m using here is a SafBrew S-33.  It is supposed to be fairly clean, without many esters and finish somewhat high on the gravity.  Leaving a little sweetness will be great.
Enjoy!
Photos courtesy of Mrs. Thirsty

Friday, March 8, 2013

Crème Brulee

When I we first moved to California, I slowly became obsessed with what I consider to be one of the best desserts ever conceived.  Sweet and creamy, cool and a bit crunchy, decadent yet not cloying I am of course talking about Crème Brulee.  Literally translated to Burnt Cream, this is very simply a custard base with a melted sugar crust.  I was somewhat intimidated by this dessert, not really understanding the versatility of eggs and how vital a role they play, and since Mrs. Thirsty is lactose intolerant, this wasn’t one of those dishes that she wanted me making all the time to perfect.  Not that she didn’t enjoy it, just that the price of entrance had to be worth the main event.  With that in mind I would occasionally use coconut milk, trying to find something we could both enjoy.  Since moving to Germany we have found that there are a lot of Lactose Free products that we didn’t find so readily available in North America, the largest brand being MinusL.  They have this heavy cream that is lactose free and wonderful to work with, and work with it I do.  We generally keep about 3 boxes of this hanging around the apartment at all times, just in case I get it in my head that I want some crème brulee.  After playing with various ratios of egg to cream, and different flavourings I found this has been my best base for a crème brulee, from here you are only limited by your imagination

Finished Product FirstIsn't it beautiful!!


Crème Brulee
Prep Time: 30 minutes
Cook Time: 50 minutes
Number of Servings: 6 – 150ml ramekins
Ingredients:
Qty     Measurement            Item
6                                           Egg Yolks (Free Range is ideal, deep orange and rich)
700      millilitres                  Heavy Cream (Est. 3 cups)
1          5cm                           Cinnamon Stick
1                                            Vanilla Bean, Split and scraped
1          strip                           Lemon Zest, removed with potato peeler
65        grams                        Granulated Sugar (1/3 cup)
15        grams                        Honey (2 Teaspoons)
50        grams                        Turbinado Sugar (for Brulee) (4 Tablespoons)

Steps:
1)      Preheat oven to 170°C (325°F)
2)      Combine heavy cream, cinnamon, vanilla and lemon zest into heavy sauce pan over low heat.  Steep for approximately 20 minutes.  Do not boil.
3)      Whisk together sugar, honey and egg yolks until smooth & creamy
4)      Strain flavoured cream to remove solids then slowly pour into egg mixture.  Whisk constantly while adding small amounts of cream.
5)      Pour custard into ramekins and place ramekins into water bath
6)      Bake custard for 40 minutes and check, centre of custard should slightly wobble/jiggle a bit.  If too liquid continue cooking for 5 minutes at a time and check.
7)      Remove from oven and water bath when custard is ready.  Cool to room temperature and then chill for at least 3 hours.
8)      When ready to serve, add Turbinado sugar to top and shake to spread.  Using torch, melt sugar evenly to a crust.  Allow crust to cool.  Custard can be put back into fridge for a short time, though the sugar may not retain crisp structure.

Bruleeing the sugar with a hand torch,
you can see some of my madelines in the background


This method generally makes a pretty thick custard base.  I love the creamy, dense texture and so I make it a little thick with a single layer of sugar burnt on top.  Mrs. Thirsty on the other hand really likes the burnt sugar and will add a second layer to the top of her crème brulee. 


Some Strawberry Creme Brulee waiting to have the sugar added


Depending on whimsy and what we have in the house I will sometimes slice some raspberries or strawberries and line the bottom of the ramekins with them.  Another time I added 50g of cocoa nibs to the cream and replaced the lemon zest with the zest from an orange, trying to make a Terry’s Chocolate Orange style Crème Brulee.  It worked out wonderfully. 


Some beautiful raspberries,
wonderful balance to the sweet flavour and creamy texture


Since there are all those left over egg whites, I usually make some Gluten Free Madeline’s, but that is for another post.  I’ll bring that one soon.


Enjoy
Photos courtesy of Mrs. Thirsty and Sister Thirsty


Tuesday, March 5, 2013

Brew Day - Berry Beer


So now that we're through the holidays and through January, I figure it’s time to plan a few different batches of beer for spring.  I started with Chilort's Raspberry & Blackberry Beer and modified based on the ingredients that I have available here. The goal here is something light, refreshing and tasty that we’ll have for those days in spring when Mrs. Thirsty and I are sitting on the balcony in the sun. 
Berry Beer
Batch Size: 10.25L             Type: Extract / Partial Boil             Boil Size: 6.7L             Boil Time: 60min

Calculated OG: 1.064      Measured OG: 1.061            Calculated FG: 1.013       Bitterness: 18.1IBUs


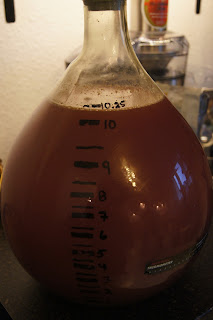
Yummy baby Berry Beer in the Carboy


Grain Bill
1.75 kg Rice Syrup - Boil for 60min
0.70 kg Raspberries, Frozen - Boil for 10min
0.30 kg Blackberries, Frozen - Boil for 10min
0.30 kg Caramelized Wildflower Honey - Flameout
0.60 kg Mixed Berries, Frozen – Added to secondary for 7 days

Hop Schedule
10.00 g Tettnang [4,50 %] - Boil 60,0min
10.00 g Tettnang [4,50 %] - Boil 30,0min
10.00 g Tettnang [4,50 %] - Boil 15,0min

0.5 pkg SafBrew Ale (DCL/Fermentis #S-33)


So I started with the honey, adding it to a small pot with 1 tablespoon of water and about half a teaspoon of lemon juice. I put this over low heat, constantly stirring until it started simmering. I let it simmer for 10 minutes before removing it from the heat and setting it to the side.

Early in the Fermentation process, notice how light it is

Following the timing identified in the Grain Bill/Hop Schedule, the boil was rather easy. My stove top doesn't seem to be hot enough to maintain a full, hard boil of that much water without a top on the kettle so I generally keep the top about 75% on the kettle and just be cautious of boil over.  Even with that caution, there were two times the wort beat me and it boiled over onto the stovetop, though the smell wasn’t terrible, almost like cotton candy.
When I added the berries, I paused the boil timer and let the kettle come back to a hard boil before I continued.   I’ve read and been told that by adding the berries to the boil, I’ve introduced the naturally occurring Pectin in the berries to my beer.  Pectin is a gelling agent that is used when making jams and jellies, that helps the product set.  Pectin is found in high concentrations in hard fruit (like apples and pears) and citrus fruit but in much lower concentrations in the berries I used.  The problem with pectin is that it is insoluble in alcohol, so as the alcohol content in the beer increases, the more the pectin will appear, making the beer cloudy.  Now, I’m willing to accept a little cloudiness, though if my order for Pectolytic Enzyme shows up before I bottle, I’ll toss some in and see what happens.


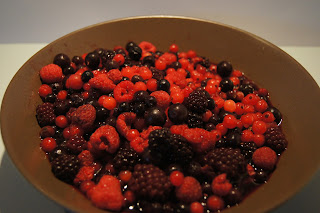
A sample of the berries I plan on using in secondary.
Raspberries, Blackberries, Blue Berries & Red Currents

I chilled the whole batch in the snow outside for about 40 minutes, poured it through a strainer into the carboy, topped off with boiled/cooled water and withdrew a hydrometer sample. I set this aside to come to room temp and pitched the yeast. The yeast was rehydrated in about 250ml of warm water, starting when the wort was put out to chill.
When I checked the next morning the airlock was burbling nicely at about 2 bubbles per second and some of the hops had floated up to the top. It’s a really deep pink colour and is definitely not clear but hopefully it’ll settle out over the next couple weeks.  After 2 weeks I plan to rack this on top of some more berries for a weeks before bottling.

Well, here comes the waiting game, damn I wish I was more patient.
Enjoy!
Photos courtesy of Mrs. Thirsty